Access requests should include an employee HR ID and a list of programs/subplans.
Support requests should include: operating system, web browser & a screenshot of the browser when the problem occurs.
For additional technical support, contact the IT Service Desk
View Applications for the Current Term
When first signing in, click Workflow
Click the hamburger menuto show/hide the workflow sidebar
Click on the triangle next to "UMB Grad Admissions" to expand your list of available queues
Select the appropriate plan queue Tip: The sidebar can be resized by dragging the right edge (which appears as a blue line when the mouse passes over it) Note: applications in Applied and Processing are incomplete; applications in Ready for Review are complete and awaiting a decision
Double-click on the application in the grid on the right side of the screen
Use the zoom, fit and rotate buttons at the bottom of the page to make the application more readable
To return to the program queue, click on Workflow or the return icon
Create Filters for the Current Term
Create filters within a workflow queue to find applications faster and manage long queues. Queues containing over 500 entries must be filtered to avoid missing results.
First, go to Workflow and open a program queue
Click on the
Add Constraint icon
Click on the Name dropdown and select Student Name The initial value "Name" refers to the internal filename
Click on the starts with dropdown and select is between
Enter A and M in the fields provided
Click Add, then click Search
Click on the
Create New Filter icon
Enter A-M in the Name field and click OK
A new filter will be listed under the queue name in the sidebar on the left
Repeat these steps to create a filter for N-Z, or using any other criteria you wish
View Related Documents
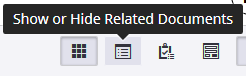
In the top right toolbar, click on the “Show or Hide Related Documents” icon
Click on the document you want to view; each document opens in a new window or tab Note: If more than one person attempts to open the same document, a warning message appears and offers a Preview Mode. Select Yes and review/annotate the document as desired. When two copies of the document are saved, all annotations are saved. A third viewer will see both sets of annotations when viewing the document.
When finished reviewing the document, close the tab or window to return to the application or workflow queue
Annotate Documents
Click on the annotate page button on the top left toolbar
Click on the document where you want the annotation to appear Note: All GPDs and committee members with access to the workflow queues are able to view annotations
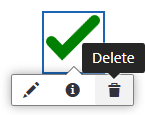
To remove an annotation, click on the annotation and select the Delete icon
Arrow: Places a red or green arrow; drag on the tail end of the arrow to change the size, angle or direction.
Check: Places a red or green checkmark.
Highlight: Places a square of translucent color for highlighting a portion of a document.
Line: Places a line; drag on either end of the line to change the size, angle or direction.
Oval: Places a solid or outlined oval.
Pen: Use this tool to “write” or scribble on a document.
Rectangle: Places a solid or outlined rectangle.
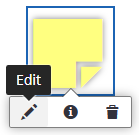
Sticky Note: Places a yellow sticky note icon; multiple users can add comments to a sticky note. As you add a comment, the system will add your Employee ID and the date and time to the comment. To view or add comments, click on the sticky note, then click on the Edit icon.
Text: Places a text box.
Text Stamp: Places a text stamp indicating a decision: Admit, Admit with Conditions, Deny, or Waitlist.
Enter a Decision
Open the application from the Ready for Review queue
Click on the Profile Sheet from the Related Documents view
Use the toolbar at the bottom to navigate to the last page of the profile sheet
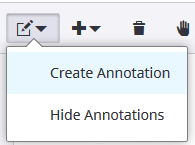
Click on the annotate page button on the top left toolbar and select Create Annotation
Click anywhere on the last page of the Profile Sheet to place the stamp Note: The stamp can be placed anywhere on the last page of the profile sheet, so long as it doesn't cover up the applicant information.
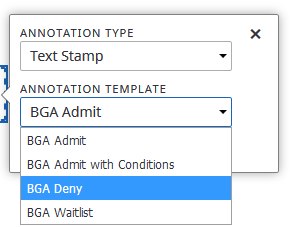
Under Annotation Type choose Text Stamp and choose the admission decision type under Annotation Template
Save the document using the save icon in the top left corner
Close the profile sheet window/tab and return to the application window/tab
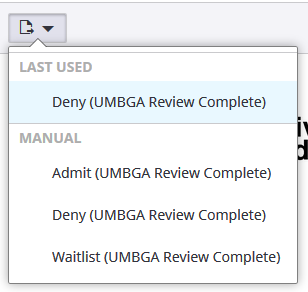
From the application window, click the Route Forward button on the top toolbar
Select the destination queue corresponding to the decision Note: if the decision is to Admit or Admit with Conditions, you must select the Admit (UMBGA Review Complete) destination queue
The application will be routed out of the ready for review queue and the queue will be displayed
Search for Archived Documents
Click on the green Perceptive Experience logo in the upper left corner
Select Documents
Click the hamburger menu at the top left and select the program archive you would like to search
Click the search box and select the search criterion from the dropdown, such as Student ID or Student Name Note: it is more reliable to search by Student ID, as searching by name may take longer and return too few or too many results If you search by Student Name, enter the name as lastname,firstname; there should be no spaces around the comma
Click Search Note: Documents related to recently decided applications may be unavailable while they are being processed by Graduate Admissions
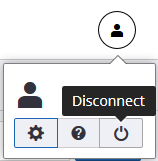
Note: Do Not close the last window or tab without without disconnecting. This may make documents inaccessible to others. If the window/tab should close accidentally, please log back in to and disconnect.